
Do-It-Yourself
Now I'm not one to steal anyone's thunder, least of all the talented Amy Tan! But I sure will take inspiration from her ever-so-cute DayBooks! And I'm always happy to use up some scraps in a clever and useful way! So, I tried my hand at making my own Daybook. I was so pleased with the whole process that I made a second one. I haven't decided what events or occasions I will use each for, but as soon as inspiration hits y'all will be the first to know!!
Here's how easy it is:
First, I pulled out a bunch of random papers and larger scraps.

I knew I wanted something pretty varied as far as colors and patterns go....and this is what began to form...

I then started to pile them up in a way that each color or pattern complimented the one beside it. As much as is possible for something that's supposed to be random anyway. 


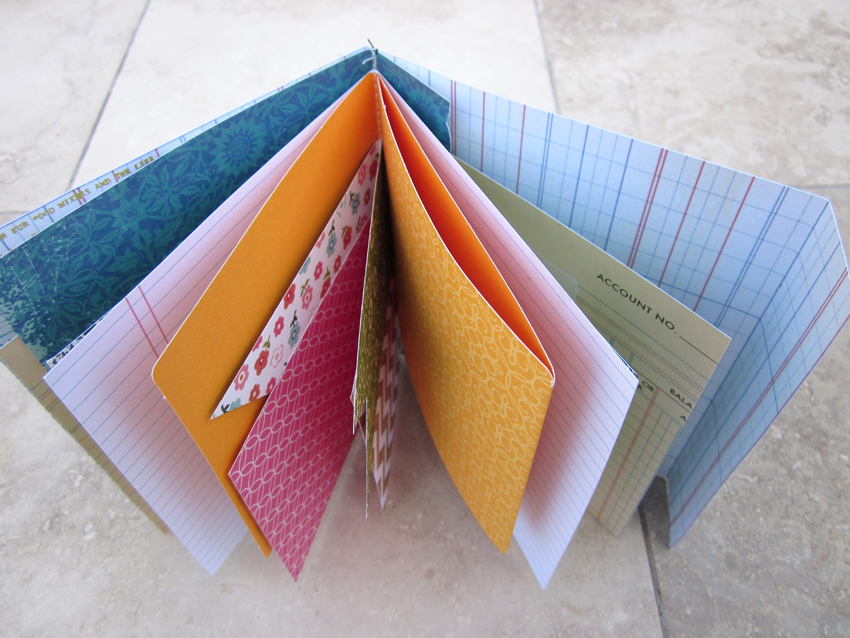
As you can see, not every piece is folded exactly in the middle, and some have different shapes, such as banners and scallops. When I was satisfied with the order, I clipped everything together and ran it all through the sewing machine. I used heavier thread, and a longer stitch length than usual.

I did have to help the machine pierce all the paper through the thickest layers, but it turned out just fine and no needles were broken in the experiment. Nor were any animals harmed.

This is how it looks finished. Well, assembled. It will be finished once I decide what pictures I want to put in it.

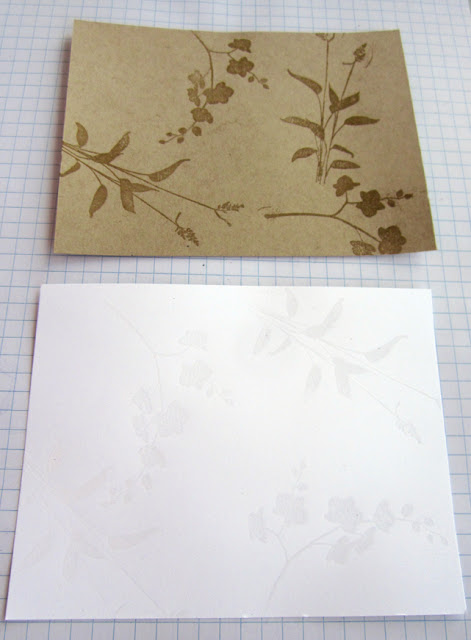
Check out the fun photo frame transparency on the front. Direct lift from Amy Tan. Cute ideas like that just have to be re-run!

Well that was just too much fun, to not do all over again!! Here are the papers that fell together for the 2nd book.

This time I had a few more in the stack so I decided to try something different for binding. I pierced holes at 1/2" intervals and then with a blunt Cross Stitch needle and crewel thread, back stitched the length of the spine.

Here's how it looks from the back.


I included a fun envelope into this book. Sure hope I have something special to save in it!

Don't be intimidated to try this. Anyone with a bunch of paper scraps and a trimmer, can do this. You don't even have to have a sewing machine!
Check back for the FINISHED projects!!
This project was recently posted at Love is in the Details.
I've made SAME THING a few days ago!!!!!! great book!!!!
ReplyDelete(I've known you at Studio Calico)